Search K
Appearance

Microsoft provides its own identity package for applications that require local accounts. Centias integrates this package to provide you with a fully-functional Identity solution out of the box.
This page will outline how to install and configure Identity with Centias and default settings.
.NET's Identity package has to be installed separately into your project. You can do so by executing the following command in your terminal:
dotnet add package Microsoft.AspNetCore.Identity.EntityFrameworkCoreThe package's major version should match your .NET installation's major version.
Instead of the standard DbContext, Identity requires an IdentityContext, for which it will create all necessary Identity tables.
A minimal IdentityContext may look like this:
using Microsoft.AspNetCore.Identity.EntityFrameworkCore;
using Microsoft.EntityFrameworkCore;

public class AppIdentityContext : IdentityDbContext
{
    public AppIdentityContext(DbContextOptions<AppIdentityContext> options)
        : base(options) {}
}
You will also have to configure the context in your Program.cs. In this example we use a MySql database with its migrations located in the project DemoIdentity and a connection string configured in an appsettings.Development.json file. For production use we recommend you store your database credentials with a key vault provider instead.
using Linkerion.Centias;
using Microsoft.AspNetCore.Identity;
using Microsoft.EntityFrameworkCore;

var builder = WebApplication.CreateBuilder(args);
builder.Services.AddDbContext<AppIdentityContext>(
    options => {
        var connectionString = builder.Configuration.GetConnectionString("IdentityConnection");
        options.UseMySql(connectionString, ServerVersion.AutoDetect(connectionString),
                b => b.MigrationsAssembly("DemoIdentity"));
        }
);
After adding the context we can build and apply a migration on the database.
dotnet ef migrations add InitIdentity
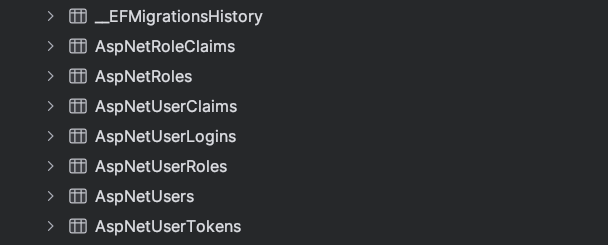
dotnet ef database updateYou will now find several new tables in your database, all beginning with AspNet as prefix. These tables store records related to your users, their logins, roles, and so on.
Finally, we can add the Identity mechanics and Centias to our Program.cs. The extension method AddIdentityCore<TIdentityUser>() must be configured with a sign-in manager, default token providers and database stores. Otherwise, the Centias default Identity setup won't function.
Generally, the setup is three-fold:
AddIdentityCore<TIdentityUser>() and its sign-in manager, token providers and database stores.AddCentiasWithIdentity(CentiasOptions options).UseCentiasWithIdentity<TIdentityUser>().If not otherwise configured, IdentityUser should be used as parameter for TIdentityUser.
using Linkerion.Centias;
using Microsoft.AspNetCore.Identity;
using Microsoft.EntityFrameworkCore;

var builder = WebApplication.CreateBuilder(args);
builder.Services.AddDbContext<AppIdentityContext>(
    options => {
        var connectionString = builder.Configuration.GetConnectionString("IdentityConnection");
        options.UseMySql(connectionString, ServerVersion.AutoDetect(connectionString),
                b => b.MigrationsAssembly("DemoIdentity"));
        }
);

builder.Services.AddIdentityCore<IdentityUser>()
    .AddSignInManager()
    .AddDefaultTokenProviders()
    .AddEntityFrameworkStores<AppIdentityContext>();

builder.Services.AddCentiasWithIdentity(new CentiasOptions()
{
    Title = "Parakeet Vans - Backend Demo",
    BaseUrl = "https://localhost:7143",
    LicenseKey = null
});

var app = builder.Build();
app.UseCentiasWithIdentity<IdentityUser>();
app.Run();
Identity Extension Methods
We currently support only AddIdentityCore<TIdentityUser>() as extension method. Support for additional extension methods may be added in future releases.
You can enable registration and password reset mechanics for users. With enabling these mechanics, you may lose control over who can register with your application. However, this will also reduce admin workload. Whether these mechanics are relevant for you depends on the nature of your application.
To enable registration or password Reset you must provide LocalIdentityAuthOptions as a second parameter to the AddCentiasWithIdentity method.
builder.Services.AddCentiasWithIdentity(new CentiasOptions
{
    Title = "Parakeet Vans - Backend Demo",
    BaseUrl = "https://localhost:7143",
    LicenseKey = null
},
new LocalIdentityAuthOptions
{
    AllowRegistration = true,
    AllowPasswordReset = true
});
Registration and password reset mechanics may require a registered email sender to interact with application users.
Default Identity options allows users to access accounts without confirmed email addresses. However, with registration enabled, you might want users to confirm their email address before they can access their account. You can adjust this with IdentityOptions.
builder.Services.AddIdentityCore<IdentityUser>(options =>
    {
        options.SignIn.RequireConfirmedEmail = true;
    })
.AddSignInManager()
.AddDefaultTokenProviders()
.AddEntityFrameworkStores<AppIdentityContext>();
Whenever you have email confirmation enabled, you should register an email sender to provide confirmation mechanics.
You can manage application users by adding a new resource and have it inherit from: IdentityUserResource<TIdentityContext, TIdentityUser, TIdentitifer>
A compact example for the standard IdentityUser may look like this:
public class UserResource : IdentityUserResource<AppIdentityContext, IdentityUser, string>
{
    protected override string SingularLabel => "User";
    protected override string Label => "Users";
    protected override string MenuGroup => "Identity";

    public UserResource(AppIdentityContext context,
        UserManager<IdentityUser> userManager) :
        base(context, userManager){}

    public override IIdentityUserFieldsMapper GetIdentityMapper()
    {
        return new IdentityUserFieldsMapper();
    }
}
The Identity mapper will use the standard fields of IdentityUser to map Email and Password fields. The email address will serve as the user's standard display name. If you want to overwrite these standard mappings, you may do so by returning your own parameterized version of the IdentityUserFieldsMapper() method.
Roles are an optional mechanic for our standard Identity setup. They can be used for role-based authorization on supported elements such as resources or dashboards. The default role class in Identity is IdentityRole. Adding roles can be done by simply chaining a call to AddIdentityCore().
builder.Services.AddIdentityCore<IdentityUser>()
    .AddSignInManager()
    .AddRoles<IdentityRole>()
    .AddDefaultTokenProviders()
    .AddEntityFrameworkStores<AppIdentityContext>();
You can manage roles with a resource similar to users by adding a resource and inheriting from:
IdentityRoleResource<TIdentityContext, TIdentityRole, TIdentityUser, TIdentifier>
Here is an example resource for the standard IdentityRole.
public class RoleResource: IdentityRoleResource<AppIdentityContext, IdentityRole, IdentityUser, string>
{
    protected override string SingularLabel => "Role";
    protected override string Label => "Roles";
    protected override string MenuGroup => "Identity";

    public RoleResource(AppIdentityContext context, RoleManager<IdentityRole> roleManager, UserManager<IdentityUser> userManager)
        : base(context, roleManager, userManager){}

    public override IList<IResourceFieldBuilder> Fields() =>
    [
        TextField.Make("Name", nameof(IdentityRole.Name)).AsDisplayName(),
        HasManyUsers<IdentityRole, IdentityUser>.Make("Users")
    ];
}
Notice how users are connected with their roles through a special relationship field HasManyUsers<TIdentityRole, TIdentityUser. This allows you to see for each role which user is associated with it.
You can also connect users to roles in the IdentityUserResource implementation with a HasManyRoles<TIdentityUser, TIdentityRole> relationship.
public class UserResource : IdentityUserResource<AppIdentityContext, IdentityUser, string>
{
    public override IList<IResourceFieldBuilder> Fields() =>
    [
        HasManyRoles<IdentityUser, IdentityRole>.Make("Roles")
    ];
}Certain configurations require an EmailSender to handle identity-specific mechanics, such as confirming an email address. To implement an EmailSender create a new class and implement the IEmailSender<TIdentityUser> interface.
The recommended approach by Microsoft for production environments is to use MailKit or similar libraries as .NET's SmtpClient is considered outdated.
An example implementation with MailKit could be as follows, however, this is not intended for use in production environments:
using Microsoft.AspNetCore.Identity;
using MailKit.Net.Smtp;
using MimeKit;

namespace WebShopBackend.Services;

public class EmailSender : IEmailSender<IdentityUser>
{
    public async Task SendConfirmationLinkAsync(IdentityUser user, string email, string confirmationLink)
    {
        var message = new MimeMessage();
        message.From.Add(new MailboxAddress("Parakeet Vans", "no-reply@parakeetvans.com"));
        message.To.Add(new MailboxAddress(user.UserName, email));
        message.Subject = "Please confirm your Email Address";
        message.Body = new TextPart("HTML")
        {
            Text = $"""
                   <h2>Welcome to the Parakeet Vans Team,</h2>

                   <p>Please confirm your email address by clicking on the link below:</p>

                   <a href="{confirmationLink}">Confirm Email Address</a>

                   <p>Thank you,
                   your Parakeet Vans Team</p>
                   """
        };

        using var client = new SmtpClient();
        await client.ConnectAsync("localhost", 1025, false);
        // Note: only needed if the SMTP server requires authentication
        await client.AuthenticateAsync("test", "password");
        await client.SendAsync(message);
        await client.DisconnectAsync(true);
    }

    public async Task SendPasswordResetLinkAsync(IdentityUser user, string email, string resetLink)
    {
        var message = new MimeMessage();
        message.From.Add(new MailboxAddress("Parakeet Vans", "no-reply@parakeetvans.com"));
        message.To.Add(new MailboxAddress(user.UserName, email));
        message.Subject = "Password Reset Requested";
        message.Body = new TextPart("HTML")
        {
            Text = $"""
                    <h2>Hello,</h2>

                    <p>You've requested to reset your password. Please click on the link below to set
                    a new password for our system:</p>

                    <a href="{resetLink}">Reset Password</a>

                    <p>If you didn't request to reset your password, please ignore this email.</p>
                    <p>Thank you,
                    your Parakeet Vans Team</p>
                    """
        };

        using var client = new SmtpClient();
        await client.ConnectAsync("localhost", 1025, false);
        // Note: only needed if the SMTP server requires authentication
        await client.AuthenticateAsync("test", "password");
        await client.SendAsync(message);
        await client.DisconnectAsync(true);
    }

    public Task SendPasswordResetCodeAsync(IdentityUser user, string email, string resetCode)
    {
        // Centias uses a Reset Link instead
        throw new NotImplementedException();
    }
}
Commercial Email Services
Many platforms exist to handle automated email messaging through API calls. Some of these platforms come with out-of-the-box clients for .NET. You can of course use such clients in place of MailKit depending on your email infrastructure setup.